Remember the slogan, "Pack it in, pack it out"? Although that principle applies, there is more to be learned about using and respecting the outdoors. Here is some information about "Leave No Trace" to get you started.
Leave No Trace Center for Outdoor Ethics is an educational organization whose mission is to teach people how to enjoy the outdoors responsibly and reduce their impacts on the environment.
A little history of LNT from their website:
"Leave No Trace was incorporated as a 501-c-3, nonprofit organization in 1994, though the Leave No Trace concept is over 40 years old. Leave No Trace was formally conceived of by the U.S.D.A. Forest Service in the 1960’s. However, as public land use expanded and land managers witnessed the biophysical effects of this use, the Forest Service along with the National Park Service and the Bureau of Land Management developed early wilderness ethics practices.
By the mid-1980’s, the Forest Service had a formal “No-Trace” program emphasizing the cultivation of new wilderness ethics and sustainable no-trace travel and camping practices. The success of this program lead to cooperation among the Forest Service, National Park Service and Bureau of Land Management’s authorship of a pamphlet entitled “Leave No Trace Land Ethics.”
In the early 1990s, the Forest Service worked with the National Outdoor Leadership School to develop hands-on, science-based minimum impact education training for non-motorized recreational activities.
An outdoor recreation summit was convened in 1993 including the various outdoor industry and sporting trade associations, NOLS, nonprofit organizations, outdoor manufacturer and federal land management agencies to create an independent 501-c-3, nonprofit organization called Leave No Trace, Inc. The organization, now known as the Leave No Trace Center for Outdoor Ethics (the Center), was incorporated to develop and expand Leave No Trace training and educational resources, spread the general program components, and engage a diverse range of partners from the federal land management agencies and outdoor industry corporations to nonprofit environmental and outdoor organizations and youth-serving groups..."
Are you familiar with "Leave No Trace" principles? These principles are both guidelines and techniques recommended to minimize overuse of both backcountry and frontcountry natural areas.
**Plan Ahead and Prepare
**Travel and Camp on Durable Surfaces
**Dispose of Waste Properly
**Leave What You Find
**Minimize Campfire Impacts
**Respect Wildlife
**Be Considerate of Other Visitors
Check out the LNT principles page for an in-depth discussion of the list above and then take the Online Awareness Course to see how much you learned!
For both the outdoors and for ringing in the new year: Enjoy Responsibly!
Thursday, December 29, 2011
Wednesday, December 21, 2011
Hiking as Creative Inspiration
Do you document your hikes? In what way? Photos? Sketchbook? GPS?


Here are a few samples of hike-inspired artwork I've done over the years. Enjoy and Happy Solstice, everyone!


Thursday, December 15, 2011
Settling into Winter

Late fall on Mt. Yale, Colorado
Oh, so many activities and so little time!
You hear the crunch, crunch, crunching of snow under your feet. Sparkling crystals of hoar frost on tree branches may catch your eye. Animal tracks are imprinted into the snow. The beauty of nature changes with the seasons and winter is often a more peaceful time to get outside.
Snowshoeing is a great way to keep hiking during winter months. A basic pair of snowshoes, warm boots and socks, gaiters, poles, and several layers of clothing are all you need for a great day out in addition to your winter hiking pack. I like bringing along a thermos full of hot tea or apple cider to enjoy during breaks along the trail.
Many people like cross-country skiing as a crossover sport to hiking and bicycling. If you have trails close and gear handy, this is a fun way to keep fit. Groomed trails, golf courses, and parks are often available as nearby places to explore with cross-country skis.
One simple activity that I really enjoy during the winter is trail running! We are lucky enough to have some beautiful trails just blocks from where we live. Low snow volume in winter (we live in the "banana belt" rainshadow of the Continental Divide) keeps the local trails navigable. There are a few hearty souls out there that run in any weather, keeping the trails closer to town quite packed down. However, I found myself out breaking trail in 6-12" of new snow last week... and loving every minute of it! It was quite the workout but the temperature was comfortable and the scenery was amazing!
While it is nice to have the latest and greatest new gear, used snowshoes and cross-country equipment may often be found in sports consignment shops. Many specialty outdoors stores rent equipment if you'd like to "try before you buy". If you don't have anyone experienced to go with, there are often local guides or groups to check into (contact your local outdoors store). One website that might be of help is here.
What are some of the ways you enjoy winter outside?
Tuesday, December 6, 2011
Blister Basics
I have developed a blister. Now what?
If you can figure out why the blister developed, it will be easier to understand what to do to prevent the blister from becoming worse. Some possible causes:
Is the pressure ok with the blister intact or do you need to lance it?
Depending on the location of the blister and your tolerance to pain, consider whether to lance or not. If you do lance the blister, are you able to keep the area clean to prevent infection?
Techniques
For basic, easy to access blisters, a traditional donut works well. Cut an oval or circle from a piece of moleskin or molefoam 1/4" or so larger than the blister circumference. Then cut a hole out of the circle just larger than the blister. Peel off the sticky backing and stick to clean skin surface. (If you are having trouble getting anything to stick to the skin, use tincture of benzoin on the skin to help increase the stickiness.) Cover with a protective layer of paper tape, making sure the tape is smooth and not creating further wrinkles. If the blister has been opened, a layer of 2nd Skin between the blister & donut soothes and protects the skin.
You can modify this technique to use for various scenarios. I will often use a smaller, second donut on top of the first (looks like a topo map from above) if I need to raise the area around the blister to alleviate pressure. If a full donut won't fit, you can contour strips of moleskin instead. This often works for the blister that develops on the side of the foot next to a callous.
Ends of toes can be a challenge. If there is enough room in the shoe without causing further pressure, try a small donut. Very carefully tape a toe-width strip up & over the top. Add tape wraps around the toe, smoothing out any wrinkles.
Donuts can work well between the toes also. Make sure you create enough space for the blister to reside within the donut hole. Cover smoothly with tape.
Blisters developing underneath toenails can cause a lot of pressure to build up (even lifting the nail off its bed in extreme cases). Lancing a blister such as this is more advanced and not for the faint of heart. I'm not going to go into detail about that today.
Bottom line: Do your best to figure out and correct the cause of the blister. Experiment to find what works for you. If something doesn't work for you, change it on the trail, don't suffer if you don't have to!
Suggestions for making your own "Blister Kit":
Here's an excellent article on blisters by WMI.
If you can figure out why the blister developed, it will be easier to understand what to do to prevent the blister from becoming worse. Some possible causes:
- Ill-fitting shoe (too loose, too tight, loose heel pocket)
- Pressure Point(s)
- Toenails hitting front of shoe
- Callous/thick skin rubbing next to soft/supple skin
- Heel
- Side of foot
- Next to a callous
- Between toes
- Under a toenail
- Tip of toe
Is the pressure ok with the blister intact or do you need to lance it?
Depending on the location of the blister and your tolerance to pain, consider whether to lance or not. If you do lance the blister, are you able to keep the area clean to prevent infection?
Techniques
For basic, easy to access blisters, a traditional donut works well. Cut an oval or circle from a piece of moleskin or molefoam 1/4" or so larger than the blister circumference. Then cut a hole out of the circle just larger than the blister. Peel off the sticky backing and stick to clean skin surface. (If you are having trouble getting anything to stick to the skin, use tincture of benzoin on the skin to help increase the stickiness.) Cover with a protective layer of paper tape, making sure the tape is smooth and not creating further wrinkles. If the blister has been opened, a layer of 2nd Skin between the blister & donut soothes and protects the skin.
You can modify this technique to use for various scenarios. I will often use a smaller, second donut on top of the first (looks like a topo map from above) if I need to raise the area around the blister to alleviate pressure. If a full donut won't fit, you can contour strips of moleskin instead. This often works for the blister that develops on the side of the foot next to a callous.
Ends of toes can be a challenge. If there is enough room in the shoe without causing further pressure, try a small donut. Very carefully tape a toe-width strip up & over the top. Add tape wraps around the toe, smoothing out any wrinkles.
Donuts can work well between the toes also. Make sure you create enough space for the blister to reside within the donut hole. Cover smoothly with tape.
Blisters developing underneath toenails can cause a lot of pressure to build up (even lifting the nail off its bed in extreme cases). Lancing a blister such as this is more advanced and not for the faint of heart. I'm not going to go into detail about that today.
Bottom line: Do your best to figure out and correct the cause of the blister. Experiment to find what works for you. If something doesn't work for you, change it on the trail, don't suffer if you don't have to!
Suggestions for making your own "Blister Kit":
- scissors
- moleskin, molefoam
- Band-Aid blister blocks or similar gel-type pads
- Adhesive strips
- Paper (i.e., Micropore) tape
- Tincture of benzoin vials (available here or here)
- needle(s) and something to sterilize them with, such as a lighter
- Sterile gauze pads
- Water based gel pads (such as 2nd Skin)
Here's an excellent article on blisters by WMI.
Thursday, December 1, 2011
Footcare 101
Hikers frequently ask me, "How do I deal with hot spots and blisters on my feet?" The best choice, in my opinion, is Preventive Care.
Cover "hot spots" & sensitive areas.
An upcoming post will discuss what to do once you get a blister. Thanks for visiting!
You may already know if and where your feet have sensitive or irritated areas while hiking. In that case, you may wish to cover those "hot spots" with moleskin, a gel pad, or tape before heading out for your hike. I prefer to use a breathable paper tape called Micropore (available at most pharmacies) but there are many different tapes out there that will work.
Here are some ideas for preventing blisters:
- At the first sign of irritation or discomfort, check your feet. Cover hot spots to keep friction between the sock & your skin from causing blisters.
- Make sure the tape or whatever you are using is smoothed out -- wrinkles may promote more blisters!
- Fabrics that wick such as acrylic, merino wool, or wool blend are great for hiking socks. Most are available in various thicknesses.
- Cotton can be too abrasive and retain moisture so it is not recommended for hiking.
- There are "toe" socks (i.e., Ininji, etc.) that some people find easier to wear than taping between their toes.
- I prefer a thin sock in hot weather and sometimes use a coolmax/cycling sock to minimize foot perspiration.
- Air them out at lunchtime if weather permits.
- Change socks if necessary.
- A proper fit will minimize blisters and pressure points.
- Nasty, blood-filled blisters can form under toenails from repetitive jamming into the front of your shoes.
An upcoming post will discuss what to do once you get a blister. Thanks for visiting!
Wednesday, November 30, 2011
Seize the Day!
The weather was so nice that I just had to get out on the trails today! The video above is the view from my trail run this morning. Enjoy the scenery!
Please check back in the next couple of days for some footcare tips. :)
Friday, November 25, 2011
Hiking in Cooler Weather: Thoughts about Staying Warm

Crisp fall days are in full swing here in Colorado as well as in many regions around the globe. A few ski resorts are already opening ski runs and winter is on its way! There's no need to hibernate and wait for spring to go hiking... dress appropriately so you can stay active throughout the winter months with snowshoeing, cross-country skiing, and winter walks.
Layer Up!
An issue we face in winter is getting overheated by wearing too heavy or too much clothing. The more aerobic the sport, the more this is a factor. Being wet from perspiration subjects you to evaporative cooling. That means you can get colder and increase your risk for hypothermia when you sweat. Brrrr!
Consider the concept of "layering". Having multiple items of clothing available to put on and take off as you chill or begin to overheat helps to keep that perspiration level at a minimum. Clothing fabrics do make a difference. Cotton is not recommended for colder climates because it retains moisture when wet.
Start next to your skin with a "base" layer, such as lightweight synthetic or wool long johns and t-necks. Add an "insulating" layer, such as microfleece or polarfleece. Top it all off with a breathable "outer" layer or "shell", such as a waterproof, breathable Gore-tex or more breathable, water-resistant softshell.
Add more insulating layers (more microfleece or a vest) as you cool down and take them off when you feel you begin to overheat. I like to carry a down sweater in my pack as an extra insulating layer to don when stopping for a break.
Extremities in Extreme Weather
Hands, feet, face, and ears can be particularly sensitive to cold. These areas are often the first to be prone to frostnip or frostbite, too. Everyone has a different tolerance level. Here are a few thoughts about how I keep extremities warm:
- Gloves or Mittens: Gloves are nice when you are exerting yourself, but if you plan on stopping for any length of time (i.e., ski lift riding or perhaps just a lunch break), mittens are warmer. A wicking glove liner under a mitten can be a saving grace if it's cold and you have to do something that requires a glove to come off (like fasten a snowshoe binding!). Slide a handwarmer between the glove liner and mitten if your fingers are really cold.
- Shoes & Socks: I have good fitting, insulated boots for activities such as snowshoeing. A medium-thickness, merino wool sock works well for me. If you have room in your boot, you may want a couple of layers but keep in mind you'll need some literal wiggle room for your toes.
- Face, Head, Ears: Recommended items include a Fleece/Windproof Earband, Toques/Knit hat, and Neck gaiter/Balaclava. It's nice to have a hood on your insulating or shell layer for added protection from wind & cold.
Have fun & keep warm!
Note: These are only suggestions for you to consider. They are not intended to be a replacement for your good judgment. If it is cold outside and you don't feel you have appropriate clothing, go visit your local gym.
Tuesday, November 22, 2011
Food For Thought!
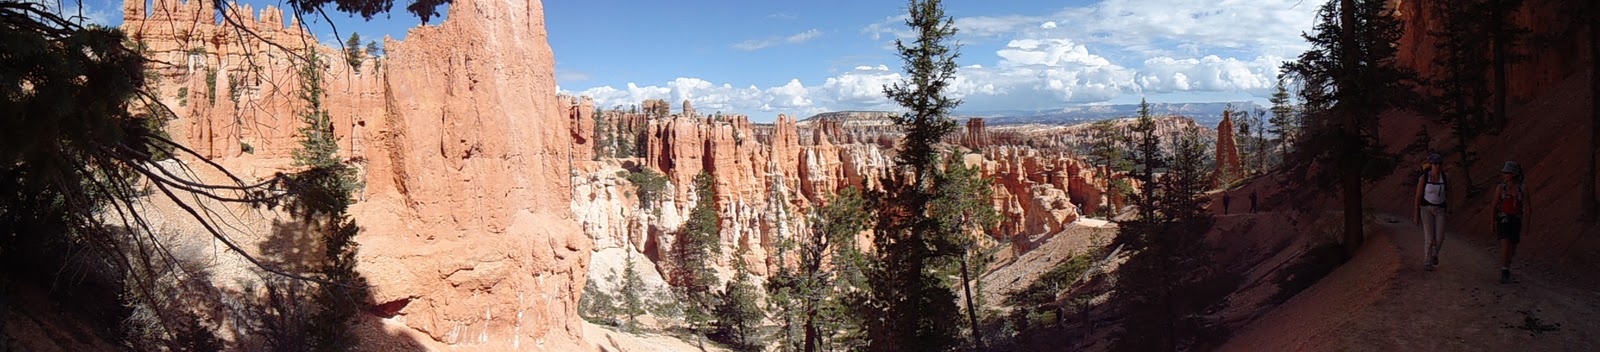
Peek-A-Boo Loop trail, Bryce Canyon National Park
Since it is Thanksgiving week, everyone seems to be contemplating food! Almost any kind of food tastes so much better out on the trail, don't you think?
It almost goes without saying that if you don't eat properly while on the trail, you set your body up for using up its energy, creating a "crash" or "bonk". Not fun! Having a selection of foods available in your pack or cargo pocket of your clothing (and eating them!) on short breaks along the trail will help keep the dreaded "bonk" at bay.
While I'm not a nutritionist, it seems that a selection of varied foods such as nuts, dried fruit, bagels, pretzels, peanut butter, and even chocolate contain calories that your body can use both quickly -- and slowly -- throughout the day. Ultimately, it comes down to what works and tastes best to you. Below is a sample selection of some of the possibilities and what we usually provide for our guests on a hiking tour.
For sandwiches:
- lunch meat (generally deli turkey and ham)
- cheese (swiss and muenster or gouda, sometimes cheddar)
- veggies such as spinach, sliced cucumbers and red peppers, tomato, avocado
- hummus
- brown mustard, mayonnaise
- Creamy & crunchy peanut butter
- strawberry or grape jam
- various "nice" breads (like Orowheat or locally baked breads)
- Chips (Sun Chips, pretzels, Fritos, Lay's BBQ, etc.)
- Cookies (Fig Newtons, chocolate chip, pecan sandies, etc.)
- Granola bars (crunchy or chewy, various flavors)
- Fruit (apples, grapes, plums, bananas, etc... whatever is in season)
- Trail Mix (a pre-bagged combination of raisins or craisins, dry roasted peanuts, cashews or smoked almonds, and two kinds of M&Ms)
- Chocolate (usually what I like to refer to as the "Butterfinger food group")
To sum it all up, just take along a selection of sweet and salty snacks plus a sandwich and plenty of water (and/or Gatorade). That way, you'll have your bases covered for both nutrition and energy needs throughout the day.
Happy Hiking and Happy Thanksgiving!
Thursday, November 17, 2011
What's in your Pack?
To begin, a good fitting pack can make your hike a lot easier. That is, the waist belt down at your thighs (if you're short) or up at heart level (if you are tall) isn't much fun at all. Wide, padded shoulder straps help keep the weight of your pack from digging into your shoulders. Make sure the straps are properly adjusted so that the weight of the pack rests on your shoulders & hips. And those straps on the sides of the load? Those are "compression" straps. People often leave them hanging loose then wonder why their backs get so sore. Tighten them up, keeping the contents of your pack from pulling back on your shoulders.
Also, many backpackers already know this but often dayhikers do not: pack your heaviest items closer to your spine. This also can save weight pulling your back into unnecessary extension, causing further pain. If you have a sternum strap in the front, adjust and buckle it so that it goes across your upper chest/sternum area.
I prefer having an option for a water reservoir (i.e., Camelbak bladder) inside the pack. There are also pockets on the sides of my pack which can carry water bottles. Having easy access to liquids seems to help hikers to drink more. On longer hikes and hot days, I will often carry a full Camelbak bladder as well as a 1L water bottle. Gatorade or an electrolyte-type drink can go in a regular Nalgene or collapsible Platypus soft bottle to keep your reservoir available for water only, if you like.
A question I am frequently asked on tour is: "What is in your pack?". I used to carry a 45L pack, with everything except the kitchen sink (!), mainly because I wanted a pack that would serve both winter and summer activities. After a lot of unneeded hauling, I switched to a 25L woman-specific daypack. Having one season under its hipbelt, it has served me well thus far. Some people opt to hike with smaller Camelbaks or waist packs. That is fine... as long as you can take the water, food, and layering you will need for your hike. Remember to plan for possible weather conditions and emergencies. You probably won't need that down sweater if you are hiking in the desert in summer!
Here are some of the other items I keep in my pack when I am guiding:
- Food (Lunch + extra snacks, possibly a gel or two)
- Water/Gatorade (If I'm not carrying enough for all day, I bring a backpacking water filter)
- Layers/Wind or Rain Shell/Hat (Toque & gloves or extra socks if it may get cold)
- Map/Compass (Guidebook, if necessary)
- First Aid kit (enough to deal with basic emergencies)
- Foot Care/Blister kit
- Emergency kit with headlamp, extra batteries, cord, duct tape, lighter or matches
- Large trash bag (can double as a poncho for someone if needed)
- Bandanna
- Plastic zip bag with hand sanitizer, tissues, extra sunscreen, lip balm
- Other possibilities: down sweater, binoculars, field guide, camera, ID, Insurance card, small amount of cash

We'll talk more about some of these items in further detail later, but I just wanted to give you an idea of what generally works for me on a regular day hike. And no, I don't bring the hand weights. ;)
Hopefully this helps! What works for you?
Tuesday, November 15, 2011
Getting Started: Nearer to Home
Even if you can't get to a National Park or hiking "destination", you can still walk or hike near home. Maybe you have a bike path you can explore. Or just walk around your neighborhood, provided it is safe enough.
Just put on a pair of walking shoes (do you have running or gym shoes?) and get outside... it's amazing how much nature you can find near home. And those miles add up! If you don't have anywhere to walk outside, try a mall (although you may be tempted to shop!).
I'm lucky enough to live in a small town with hiking trails less than a mile from my home. But when I am in the suburbs of Denver in-between tour destinations, I often take walks with my friends. As we catch up with goings-on, we walk several miles through the neighborhoods. There is a golf course where geese land on the fairways. We almost always see cottontail rabbits scurrying to and fro just past the sidewalk. In the spring and fall when the leaves on the trees are coming and going, I often notice birds' nests wedged in branches. Take some time to just... notice... nature.
Friday, November 11, 2011
So... Where To Go?
So many hikes, so little time! How do you decide where to go? Hikers I know are constantly asking me about what hiking trip to take. Most of the time, as I get to know their hiking style and find out what they like, it is relatively easy to recommend which places to visit next. For instance, if you dislike exposure and hiking up & down big hills, it makes no sense for you to hike into (and out of!) the Grand Canyon. It might not be your best choice for your first hiking trip! However, if you are up for great challenge, then you must put it on your "Bucket List"!
What interests you? Mountains, ocean, rivers? Desert, rock? Cooler places or warmer climates? Local, domestic, or foreign? Although I absolutely love the trails where I live in Colorado, I am really passionate about spending time in National Parks. Each park has its own "personality" and was established for some natural wonder or historical significance.
Let's just start with the basics. Here are some of my favorite National Parks (not in any particular order):


These are only a few from my (lengthy) list!
I find Ken Burns' 6-part documentary, "The National Parks: America's Best Idea", to be a truly inspiring and educational film. Check it out at PBS.
Many parks offer free shuttles once you are in the park. Some of these can be used for point-to-point hikes. Make sure you are up to date with the shuttle schedules before you set out. You can access each park's website on the National Park Service's main page.
Follow the link above to the park of your choice. Look under "plan your visit" or the left hand column. There are often park newspapers under the link "brochures" which list shuttle schedules as well as ranger-led programs, visitor services, park map, and some hiking trails.
Thanks for visiting and have fun exploring the possibilities!
What interests you? Mountains, ocean, rivers? Desert, rock? Cooler places or warmer climates? Local, domestic, or foreign? Although I absolutely love the trails where I live in Colorado, I am really passionate about spending time in National Parks. Each park has its own "personality" and was established for some natural wonder or historical significance.
Let's just start with the basics. Here are some of my favorite National Parks (not in any particular order):

Glacier National Park, MT:
Known for its abundance of wildlife and flowers, Glacier's most beautiful hiking trails may lead you into beautiful alpine settings with spectacular views of angulated peaks and turquoise blue glacier-fed lakes. You may spot a mountain goat, bighorn sheep, black or grizzly bear from the trail... how exciting! 
Yosemite National Park, CA:
Yes, you can find solitude in one of North America's most popular parks. It won't be in Yosemite Valley, though, but the Valley is popular for good reason. Granite cliffs of more than 3000' high line the valley. Incredible views are abundant. But get back in the backcountry more than two or three miles and you'll leave a lot of those valley crowds behind. Don't get me wrong -- there are some amazing hikes accessing the valley (Panorama Trail, Yosemite Falls). The more adventurous may wish to check out hikes out of Tuolumne Meadows and beyond, especially if you love getting into the high country! 
Bryce Canyon and Zion National Parks, UT:
These two gems of the Colorado Plateau are so close yet so different. Bryce Canyon is not really a canyon -- the park is comprised of the Paunsaugunt Plateau as well as the colorful Bryce Ampitheater. Bryce Ampitheater is a wonderland, filled with brilliant colored hoodoos. Zion Canyon, carved by the Virgin River, is an awe-inspiring landscape. Towering rock walls of pink, cream, and vermillion loom above you, that is, unless you take to one of the trails that access the East or West Rim!
Rocky Mountain National Park, CO:
What's not to love about Rocky Mountain? I've got a special fondness of this park since this was my first park to visit when I was a child. Snowcapped peaks, alpine wildflowers, and elk abound! Many of the popular trailheads lie near Moraine Park or Bear Lake. If you want a real challenge, try Long's Peak, at a summit elevation of 14,255', is the tallest and one of the most recognized peaks of the Front Range. Train for the hike, though... it's at least 14 miles round trip and 5,100' of vertical rise to the summit! Whew!
Grand Canyon National Park, AZ:
An American icon. Many hikers I've met over the years have had "Hiking to the bottom of the Grand Canyon" on their life lists. I've hiked with several of them down & back up over the years, too. This is most definitely a special place. It can be many things: challenging, awe-inspiring (sounds cliché, but true), spiritual... People from all over the world come to visit this park. Bright Angel Trail ranks up there with the "must do" list as it takes you from nearly 7000' down to Phantom Ranch, nearly a vertical mile below. It's definitely not a day hike, but if you are willing to plan ahead and deal with rustic but comfortable accommodations, it is a wonderful overnight. For those of you who are more adventurous and experienced, offseason and lesser-known trails make for some memorable hiking/backpacking outings.These are only a few from my (lengthy) list!
I find Ken Burns' 6-part documentary, "The National Parks: America's Best Idea", to be a truly inspiring and educational film. Check it out at PBS.
Many parks offer free shuttles once you are in the park. Some of these can be used for point-to-point hikes. Make sure you are up to date with the shuttle schedules before you set out. You can access each park's website on the National Park Service's main page.
Follow the link above to the park of your choice. Look under "plan your visit" or the left hand column. There are often park newspapers under the link "brochures" which list shuttle schedules as well as ranger-led programs, visitor services, park map, and some hiking trails.
Thanks for visiting and have fun exploring the possibilities!
Tuesday, November 8, 2011
Let's Talk Safety First!
Whether you are an experienced hiker or someone just taking up hiking for the first time, safety is always important.
For example, simply letting someone know where you are going and when you'll be back is a start, especially if you take to the trails solo. Hiking alone is not recommended, though, for beginners as well as those with minimal navigational skills...!
Be Prepared.
This means a lot of things. Safety is often just using your common sense...
Food, Clothing, Shelter:
Navigational:
Equipment:
This, by no means, is a complete list for safety. It is intended to just get us all thinking about what we can do to minimize our risks out there and enhance our experience in the backcountry.
What do you think is the most important thing about safety out on the trails?
For example, simply letting someone know where you are going and when you'll be back is a start, especially if you take to the trails solo. Hiking alone is not recommended, though, for beginners as well as those with minimal navigational skills...!
Be Prepared.
This means a lot of things. Safety is often just using your common sense...
Food, Clothing, Shelter:
- Do you have layers in your pack (rainshell, fleece, hat, gloves, etc.) in case the weather changes while you are out on the trail?
- What other protection do you have against the elements? Do you have on sunscreen & sunglasses?
- How much water & food do you have available? Is it enough to get you to your destination & back?
Navigational:
- Do you know which direction to go if the trail forks? If you are hiking in a group and are spread out, wait at trail junctions or have a map/compass or guidebook with you and know how to use it.
- Are there exposed sections along the trail?
- What animals, if any, might you see along the trail? Deer, elk, moose, bears, rattlesnakes? Do you know what to do if you see one?
- What about stream crossings? Seasonal hazards, such as lingering snowpack? Can you cross safely?
- Do you have a first aid kit in your pack? Or at least one for the group (preferably more)? And most importantly, do you know how to use it?
Equipment:
- Do you have appropriate hiking shoes, socks, pack, poles?
This, by no means, is a complete list for safety. It is intended to just get us all thinking about what we can do to minimize our risks out there and enhance our experience in the backcountry.
What do you think is the most important thing about safety out on the trails?
Welcome!
Welcome to the 'Guide 2 Hiking' blog! I'm really excited to share information with you about all things hiking. Over the years, hikers I've met through guiding have asked about lots of different things including: foot care, choosing/using equipment, nutrition/hydration, what hiking trip to take next, trails, offseason activities, etc.. It is my intention to cover these topics plus many more! Have fun, hike safely, and please feel free to comment about what you would like to see on this website.
Subscribe to:
Comments (Atom)